
The plumber has repaired the leak. The puddles are gone, the windows are open and the wall no longer looks as dark as it did yesterday. It is tempting to treat that as the end of the incident. Unfortunately, the visible surface tells only part of the story.
Water does not remain politely within the stained outline. It runs along pipes, finds joints in flooring, soaks porous materials and settles in enclosed spaces where normal air circulation cannot reach it. A hidden moisture audit asks a more useful question than “Does the room look dry?” It asks where could the water have travelled, and what evidence confirms that it has left?
Divide the Property Into Three Audit Zones
A systematic inspection starts at the source but does not stop there. The affected property can be considered as three connected zones:
| Audit zone | Areas included | Main concern |
|---|---|---|
| The visible room | Skirtings, floor finishes and fitted units | Water concealed immediately behind or beneath what you can see |
| The building cavities | Wall voids, ceiling spaces and suspended floors | Restricted airflow slowing evaporation |
| The spill-over area | Rooms below, adjoining spaces and covered walls | Damage extending beyond the original stain |
This approach prevents the inspection becoming a hunt for obvious marks. Instead, it follows the property’s construction and the routes water is most likely to take.
Zone One: The Room Where the Leak Happened
1. Behind Skirting Boards and the Bottom of Walls
The junction between a wall and floor is an easy entry point. Water can slip behind the skirting and soak the lower edge of plasterboard, timber grounds or older plaster finishes. Painted surfaces sometimes appear to recover while the concealed face remains damp.
Look for swelling MDF, separating joints, a tide-like mark, flaking paint or a musty smell close to floor level. These are clues rather than a complete diagnosis. Pulling skirting off without a plan can damage reusable joinery and disturb electrical cables, so access should be proportionate to the evidence.
2. Beneath Carpet, Laminate and Timber Flooring
A floor covering may dry faster than the layers below it. Carpet underlay can hold water against a timber or screeded subfloor. Moisture entering laminate joints may affect the backing before the boards visibly lift, while water beneath timber flooring can create delayed movement as the boards absorb and release moisture unevenly.
A cool patch, soft underlay, raised edge or change in sound underfoot deserves investigation. The construction matters: the response required for carpet over concrete is not the same as engineered wood over a suspended timber floor. This is why professional water damage restoration begins with assessment rather than a standard drying formula.
3. Behind Kitchen Units, Baths and Fitted Furniture
Leaks frequently begin beside objects that make inspection difficult. Water from a sink connection can travel beneath a kitchen cabinet run. A failed bath fitting may wet the boxed-in area, floor and wall before appearing through a ceiling below. Full-height wardrobes can similarly hide damp plaster and prevent air movement.
Removable plinths or existing access panels may allow inspection without dismantling everything. Where units are made from chipboard or fibreboard, swollen edges and distorted panels can indicate that water has entered the material rather than merely touched its finished surface.
Zone Two: The Cavities Inside the Building
4. Wall Voids and Service Routes
Pipes and cables pass through holes, chases and partitions, giving escaping water a concealed route. Within a plasterboard wall, insulation and the reverse face of the board may become wet while the decorated side shows only a small patch. In solid construction, moisture can spread through absorbent plaster and masonry beyond the first visible boundary.
Moisture mapping helps define the likely extent before openings are considered. Selective access can then be made where it will provide useful evidence or improve drying, rather than cutting into walls at random.
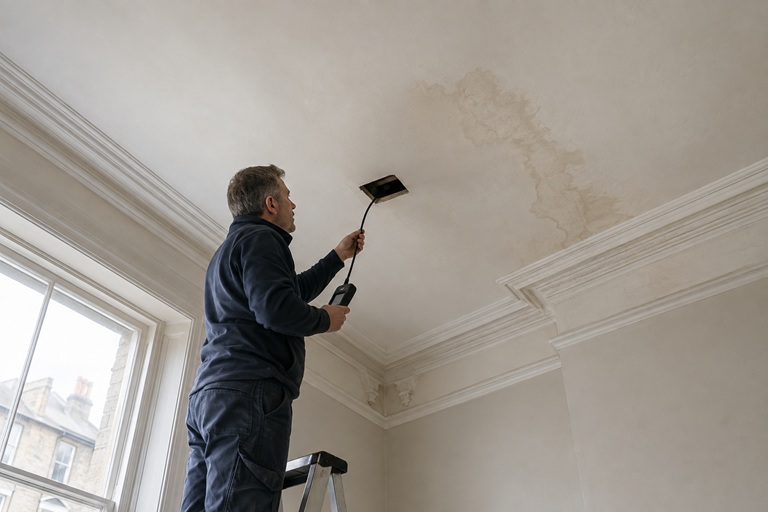
5. Ceiling Voids and Enclosed Insulation
A ceiling stain marks where water became visible, not necessarily where it began. The leak may have travelled across the upper face of plasterboard or along a joist before reaching that point. Insulation can retain water above a ceiling even when the underside begins returning to its normal colour.
Cracking, sagging or bulging should be treated cautiously because saturated ceiling material can lose strength. Keep the space below clear and obtain professional advice. Simply painting over the mark can trap the problem in place and makes later changes harder to interpret.
6. Beneath Suspended Timber Floors
In many London properties, ground floors include a void beneath timber boards. Water may drain into this space through board gaps or openings around services. Because the void is out of sight, a room can look clean while dampness remains around joists, insulation or debris below.
Existing air bricks and accessible voids should be considered as part of the drying strategy. A specialist may need to determine whether water has collected below the floor and whether additional extraction, ventilation or targeted drying is required.
Zone Three: Beyond the Obvious Damage
7. The Room Directly Below
When a leak happens upstairs, inspect the entire ceiling below—not just the first stain. Check light fittings, cornices, fitted cupboards and the wall-to-ceiling junction. Water may have moved horizontally before descending, especially where pipework or structural members interrupt its route.
Do not touch wet electrical fittings or investigate them while standing on a damp surface. Any affected equipment should be assessed by a suitably qualified professional before use.
8. The Adjoining Room
Partitions rarely form watertight boundaries. Water can pass beneath a door lining, through a shared wall or under continuous flooring. The neighbouring room may show no staining yet register elevated readings along the partition or floor edge.
Extend the inspection beyond the point at which the surface appears normal. Establishing a dry comparison area elsewhere in the property can help distinguish the incident boundary from the material’s usual condition.
9. Behind Furniture, Stored Belongings and Wall Coverings
Large furniture restricts airflow against walls, and boxes or textiles can hold dampness against a floor. Vinyl wallpaper and other low-permeability finishes may also slow evaporation from the surface beneath. An area hidden behind a bookcase can therefore behave differently from an exposed section of the same wall.
Move possessions only when it is safe, documenting damaged items first if an insurance claim is involved. Wet belongings should not be stacked together. Separate them from unaffected contents and follow any instructions provided by your insurer or restoration team.
Three Things That Do Not Prove a Room Is Dry
- The stain has faded. Surface colour can improve before deeper layers have released their moisture.
- The room no longer smells damp. Odour is subjective and may change with ventilation, heating or cleaning products.
- A domestic humidity monitor looks normal. Room humidity describes the air at that moment; it does not confirm the condition inside a wall or beneath a floor.
A professional audit combines visual evidence with suitable moisture-measuring equipment and knowledge of the building assembly. Readings are mapped, compared with unaffected materials and repeated as drying progresses. Where necessary, a controlled setup using professional dehumidifiers and air movers can then be adjusted to reach the areas that are responding slowly.
The Audit Ends With a Decision, Not a Guess
The purpose of locating hidden dampness is not to justify unnecessary removal. It is to separate materials that can be dried from those requiring access, cleaning, repair or replacement. That distinction produces a more accurate scope and prevents restoration work from covering over an unresolved problem.
If a recent leak has left you unsure what is happening behind the visible finishes, arrange a water-damage assessment in London. A measured inspection can establish the true boundary of the incident and provide a drying and repair plan based on the property itself.
