
Mould prevention does not begin when black spots appear. It begins while the wall still looks stained, the carpet is being lifted and the air feels unusually damp. At that stage, the aim is not to spray every surface. It is to remove the conditions that allow growth to establish.
The prevention equation: an unresolved source + available moisture + susceptible material + time creates mould risk.
Breaking that equation requires four controls. Each has a different job, and none can reliably compensate for another that has been ignored.
Control One — Keep the Water Source Off
A stopped leak is the foundation of every mould-prevention plan. For a failed supply pipe, that may mean isolation and a permanent plumbing repair. Roof, drainage, appliance and basement incidents require their own confirmation. A bucket beneath a drip or dry weather after a storm is not proof that the route has been resolved.
Look for more than the original fault. Water may have entered through one point and spread into adjacent rooms, service voids or the floor below. If an area becomes wetter after equipment is installed, the source may still be active or the initial moisture boundary may have been incomplete.
Document the repair, the time it was completed and any test that confirmed it. That record separates continuing ingress from moisture already held inside the building.
Control Two — Reduce the Water Load in All Three Forms
Free water is the visible or extractable water on floors, in carpets, beneath suspended floors or inside a sump. Pumping, wet extraction and safe removal of saturated contents reduce this load faster than asking a dehumidifier to deal with it through evaporation.
Held moisture has been absorbed by plaster, timber, screed, masonry and other porous materials. These surfaces may change colour quickly while remaining wet internally. Their drying behaviour depends on thickness, finish, construction and the conditions around them.
Trapped moisture sits beneath vinyl, behind skirting, inside insulation, under kitchen units or within a closed wall cavity. It is especially important because the room-facing surface can improve while the concealed layer receives little useful airflow.
A professional water-damage assessment maps these forms separately. The result may call for extraction, selective removal, a small access opening or targeted drying rather than indiscriminate strip-out.
Control Three — Build the Right Air Conditions
Evaporation moves moisture from a material into the surrounding air. Air movement helps replace the damp boundary of air sitting against a surface, while dehumidification removes released water vapour from the controlled space. Temperature also affects the process, but aggressive heating can be unsuitable for timber, finishes and traditional construction.
Opening every window is not automatically helpful. Natural ventilation may work when outside air is suitably dry and security allows it; humid weather can provide less benefit. A mechanical setup may instead require doors and windows to remain arranged in a particular way so the equipment can control the intended zone.
The correct dehumidifier and air-movement setup depends on the room volume, temperature, material load and access. Equipment should stand on a dry, stable surface with safe power and a planned method of condensate removal.
Control Four — Verify the Materials, Not Just the Mood
A room can smell fresher and feel comfortable before its slowest-drying layer is ready. Room humidity is useful for understanding the drying environment, but it does not replace measurements within or against the affected materials.
Repeat readings should be taken at consistent locations and compared with appropriate reference areas. The trend matters: is each zone reducing, stationary or becoming wetter? Different materials and instruments produce different kinds of readings, so one universal percentage cannot sign off every wall and floor.
The verification record should identify the original moisture boundary, any access made, materials removed, equipment changes and the condition reached before reinstatement. This makes mould prevention auditable rather than a promise based on elapsed time.
A conservative completion check pays particular attention to the slowest locations: wall bases, cold corners, floor perimeters and material interfaces. Averaging several good readings can conceal one remaining pocket, so isolated exceptions need an explanation rather than being lost inside the room total.
Where practical, include a short observation period after equipment is adjusted or removed. Stable conditions without renewed odour, surface change or rising readings give more confidence than a result recorded immediately beside operating machinery. This record also provides a useful benchmark if the property suffers another leak in the same area.
Five Things That Look Like Prevention but Are Not
- Painting over the stain: decoration can hide discolouration without resolving dampness behind the finish.
- Spraying bleach everywhere: indiscriminate chemical use does not remove trapped moisture and can damage materials or create unsafe fumes if products are mixed.
- Masking the smell: fragrance may alter what occupants notice while leaving the cause untouched.
- Pointing a household fan at suspected growth: uncontrolled airflow may spread dust and spores beyond the affected area.
- Stopping when the tank collects less water: lower condensate output can reflect changed room conditions, not necessarily a dry structure.
Cleaning still has an important role. The method must match the surface, extent and water source, with dirt and contamination removed before suitable disinfection where required. No cleaning product substitutes for fixing the moisture problem.
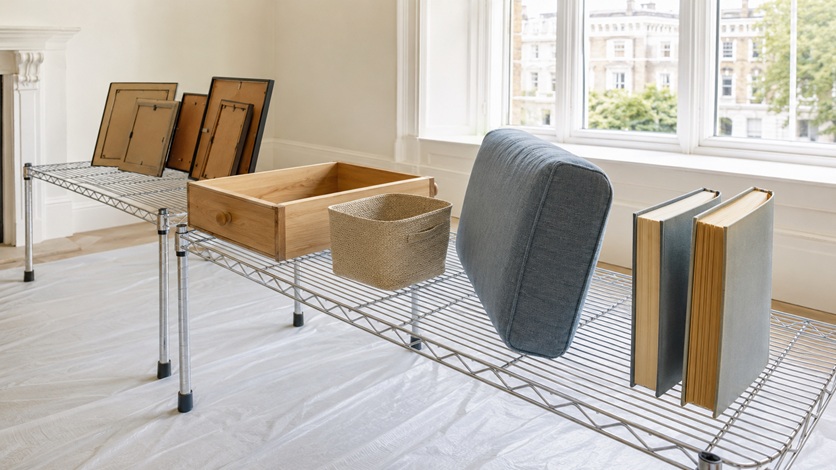
Run a Separate Prevention Lane for Contents
Wet belongings can keep a room humid and transfer moisture to surfaces that escaped the original leak. Move affected items only when it is safe, photograph them first if an insurance claim may be involved and separate wet pieces rather than stacking them together.
Hard, cleanable items can often be washed and dried. Upholstery, papers, mattresses, rugs and composite furniture need individual decisions based on saturation, contamination, value and whether thorough drying is achievable. Valuable documents, artwork and textiles may justify a specialist conservator rather than improvised heat.
Do not return apparently dry contents to an unverified room. Furniture pushed tightly against a recently affected external wall can restrict airflow and conceal renewed spotting.
When Prevention Becomes Remediation
Visible growth, persistent musty odour or recurring marks mean the plan needs to change. The task is then to define the extent, control exposure, remove or clean affected material appropriately and correct the moisture conditions that allowed it to develop.
Professional help is particularly important where growth is extensive, hidden inside ventilation or construction cavities, linked to sewage or contaminated flooding, or affecting a household with vulnerable occupants. Avoid disturbing large affected areas before suitable containment and working methods are established.
If you can see or smell mould following a leak, or cannot establish whether concealed materials are dry, request a mould and moisture assessment in London. Early investigation may keep the treatment local and prevent new finishes from concealing an unresolved problem.
The Mould-Resistant Handover
Before repairs and reinstatement begin, the handover should confirm five things: the source is fixed, contaminated material has been addressed, retained layers show suitable drying progress, enclosed areas have not been overlooked and the planned finishes are compatible with the construction.
Good mould prevention is almost invisible. It leaves no dramatic treatment to admire—only a dry, clean building with evidence behind the decision to close it up. That quiet outcome comes from controlling moisture at every stage, not waiting to see whether spots return.
